Restriction cloning of a single fragment in SnapGene tutorial
Go to parent SnapGene
Contents
Finding restriction sites in the vector
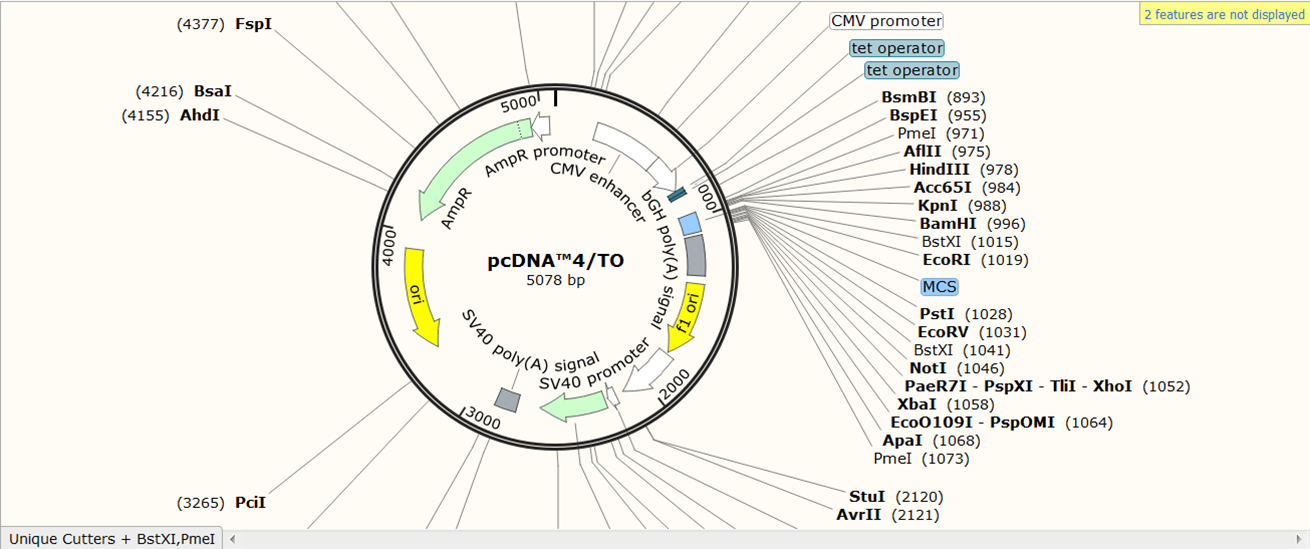
We go back to the pcDNA4/TO vector: as you can see restriction sites are automatically visualized in SnapGene:
We want to clone the amplified Rab5 fragment in the vector. To this end we want to use restriction enzymes from the multiple cloning site in the vector that cut in the primers but not in the gene of interest.
| Find two enzymes from the multiple cloning site in the vector that cut in the primers but not in the Rab5 gene. |
|---|
| By looking at the enzymes we can see that BspE1 and BamHI cut in the multi-cloning site of the vector and in the primers but not in the Rab5 gene. |
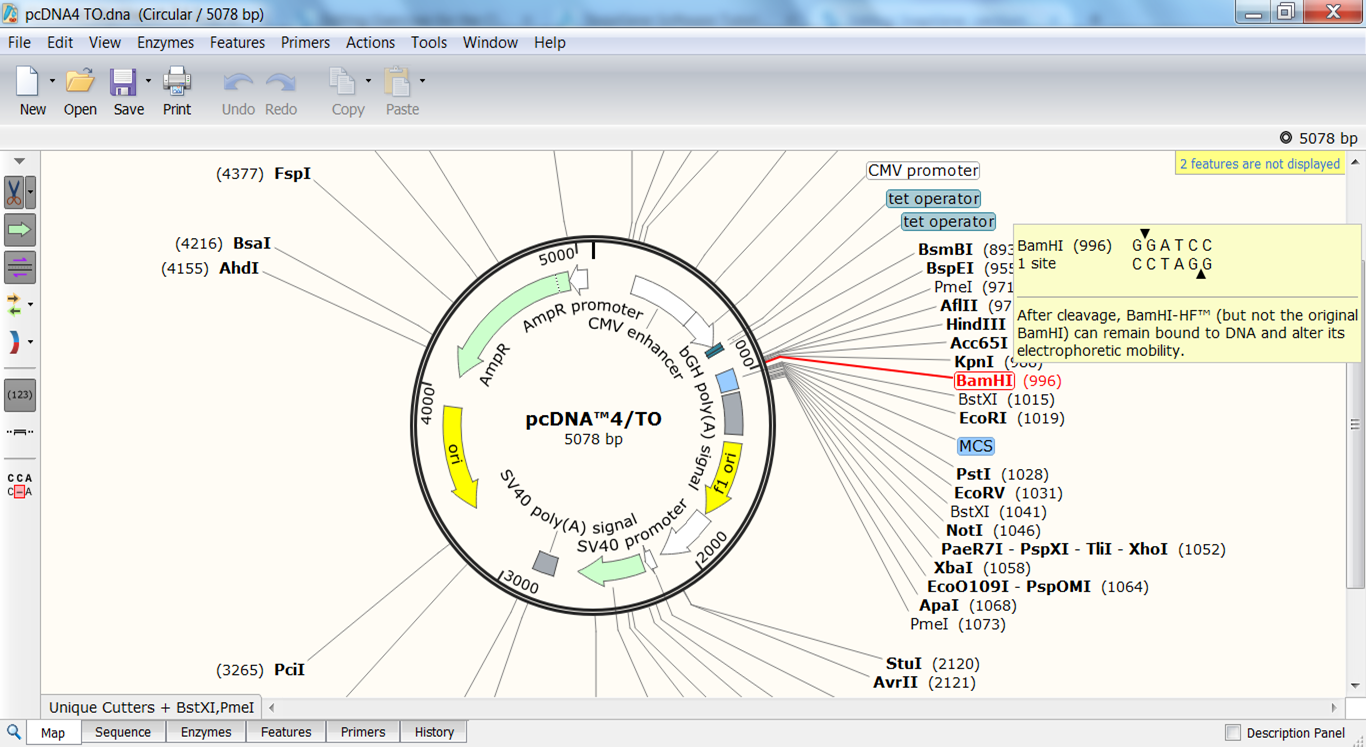
| Which overhangs are created by these enzymes ? |
|---|
| You can see the ends that are created by these enzymes by hovering your mouse over their name: |
More on restriction analysis in SnapGene
SnapGene can help you choosing the appropriate enzymes. It has useful features some of them are not avaliable in CLC e.g. finding compatible enzymes
| Check which enzymes generate sticky ends that are compatible with BamHI |
|---|
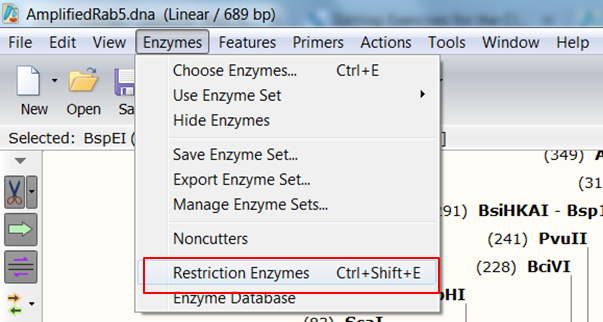
| Expand Enzymes in the top menu and select Restriction Enzymes (red):
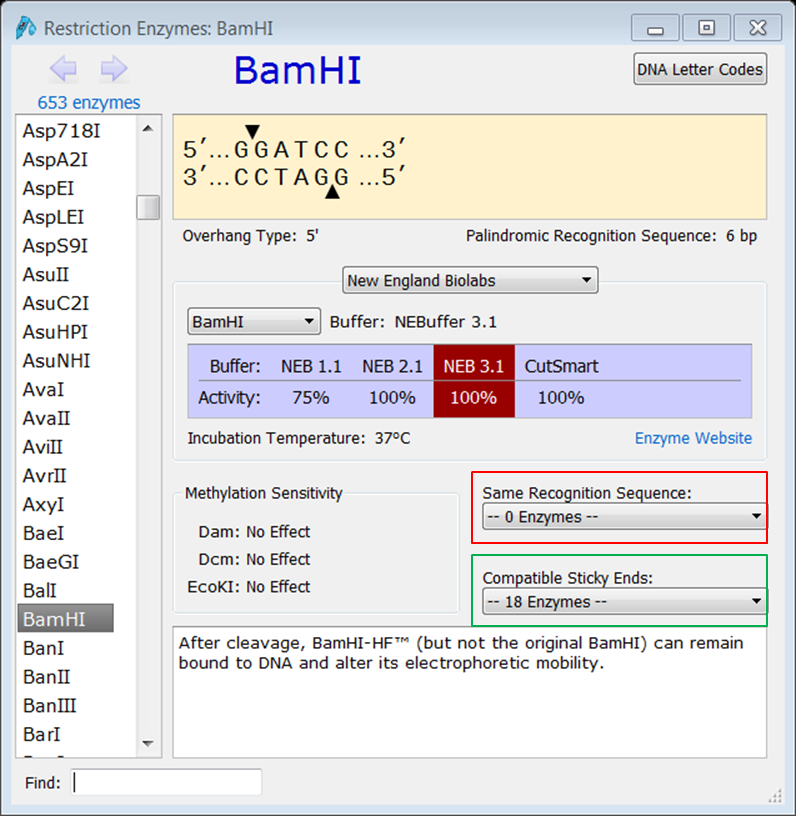
This opens the Restriction Enzymes window. Go to the BamHI page: there you'll see a lot of useful info on the use of the enzyme together with a list of enzymes with the same restriction site (red) if there are any and a list of enzymes generating compatible sticky ends (green). |
| Check which enzymes cut only once in the Rab5 PCR product |
|---|
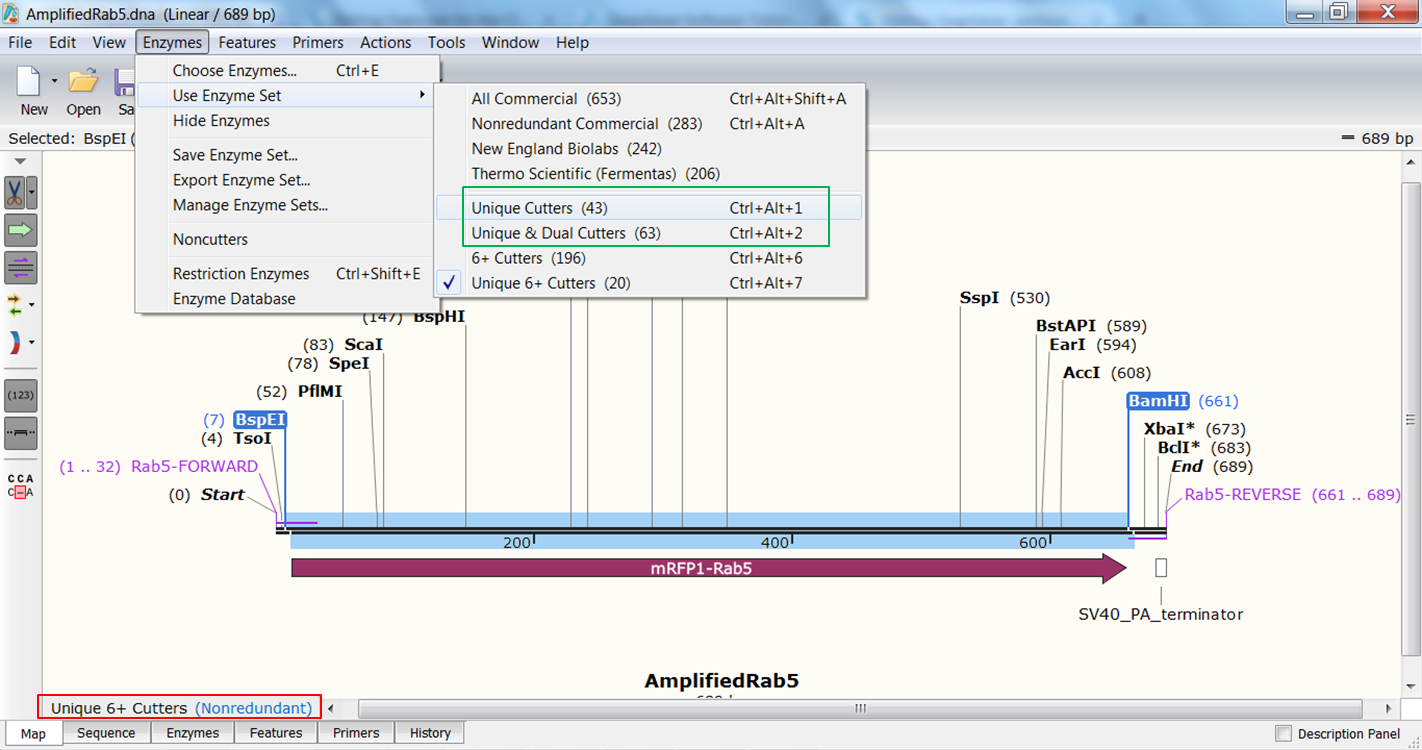
| SnapGene shows by default only cutters that cut only once in the sequence and that have a restriction site of at least 6nt (red). If you want to change this Expand Enzymes in the top menu and select Use Enzyme Set and select Unique Cutters to include enzymes that bind once but have a smaller restriction site or Unique & Dual Cutters (red) to include enzymes that bind twice in the sequence: |
As far as we know, SnapGene does not allow to select on overhang type as CLC does.
Simulating the cloning
Once you know the enzymes you are going to use you can simulate the cloning.
| Indicate the restriction sites that you are going to use. |
|---|
| Select both enzymes in the circular view of the vector by holding the Shift key during selection. This defines the fragment that is to be replaced during the cloning. The sites and the fragment should be colored blue upon selection. |
| Generate the fragment you are going to use. |
|---|
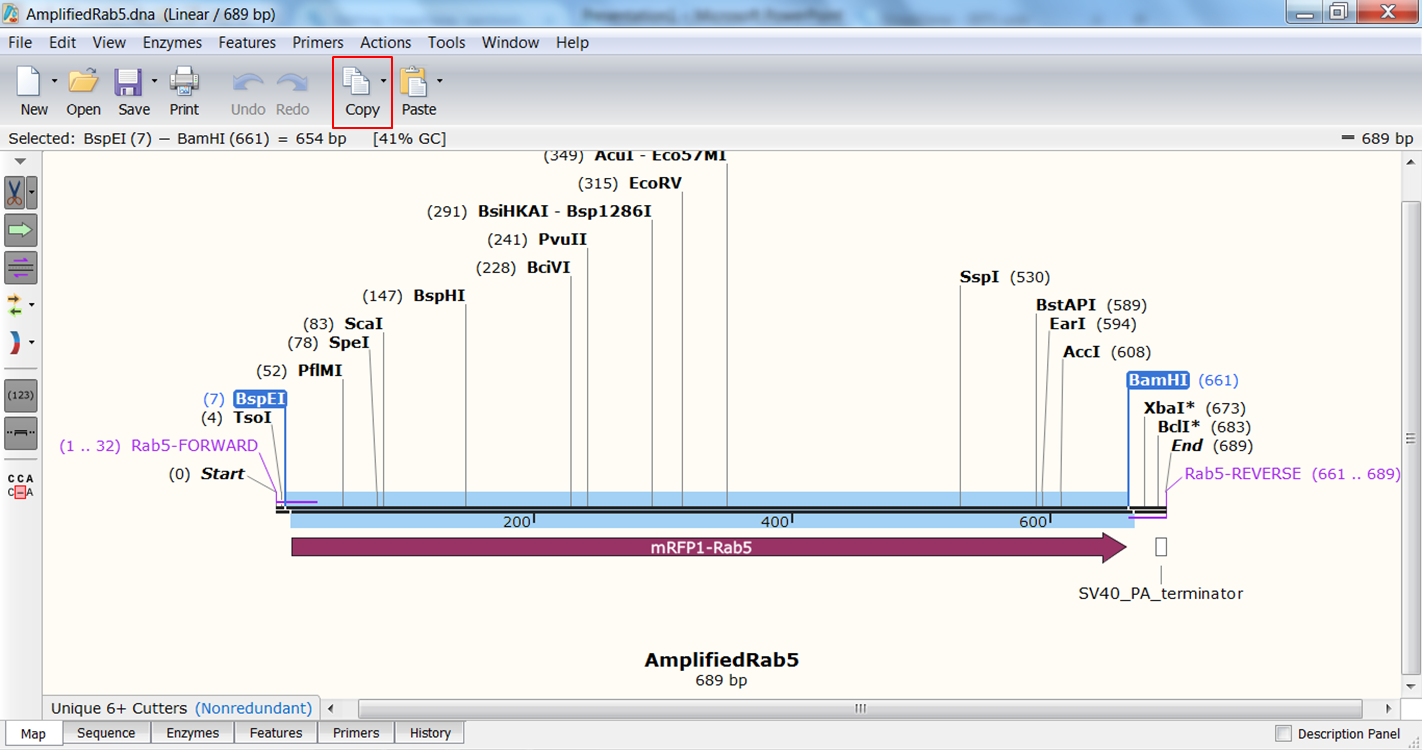
| Select both enzymes in the map view of the amplified Rab5 fragment by holding the Shift key during selection. This defines the fragment that is to be inserted during the cloning. The sites and the selected fragment should be colored blue upon selection. Click Copy in the top toolbar (red): |
| Perform the cloning. |
|---|
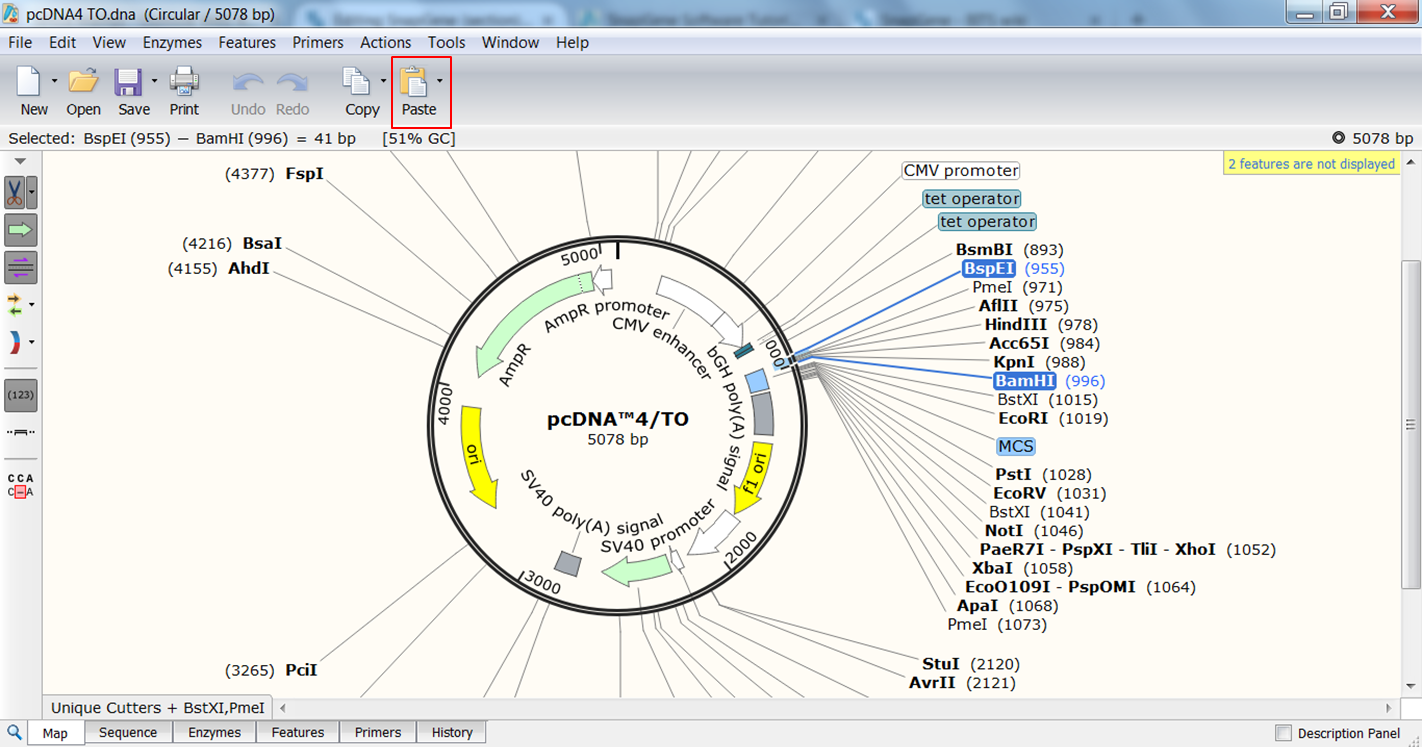
| Go back to the page of the vector where both enzymes are still selected and click the Paste button (red) in the top toolbar:
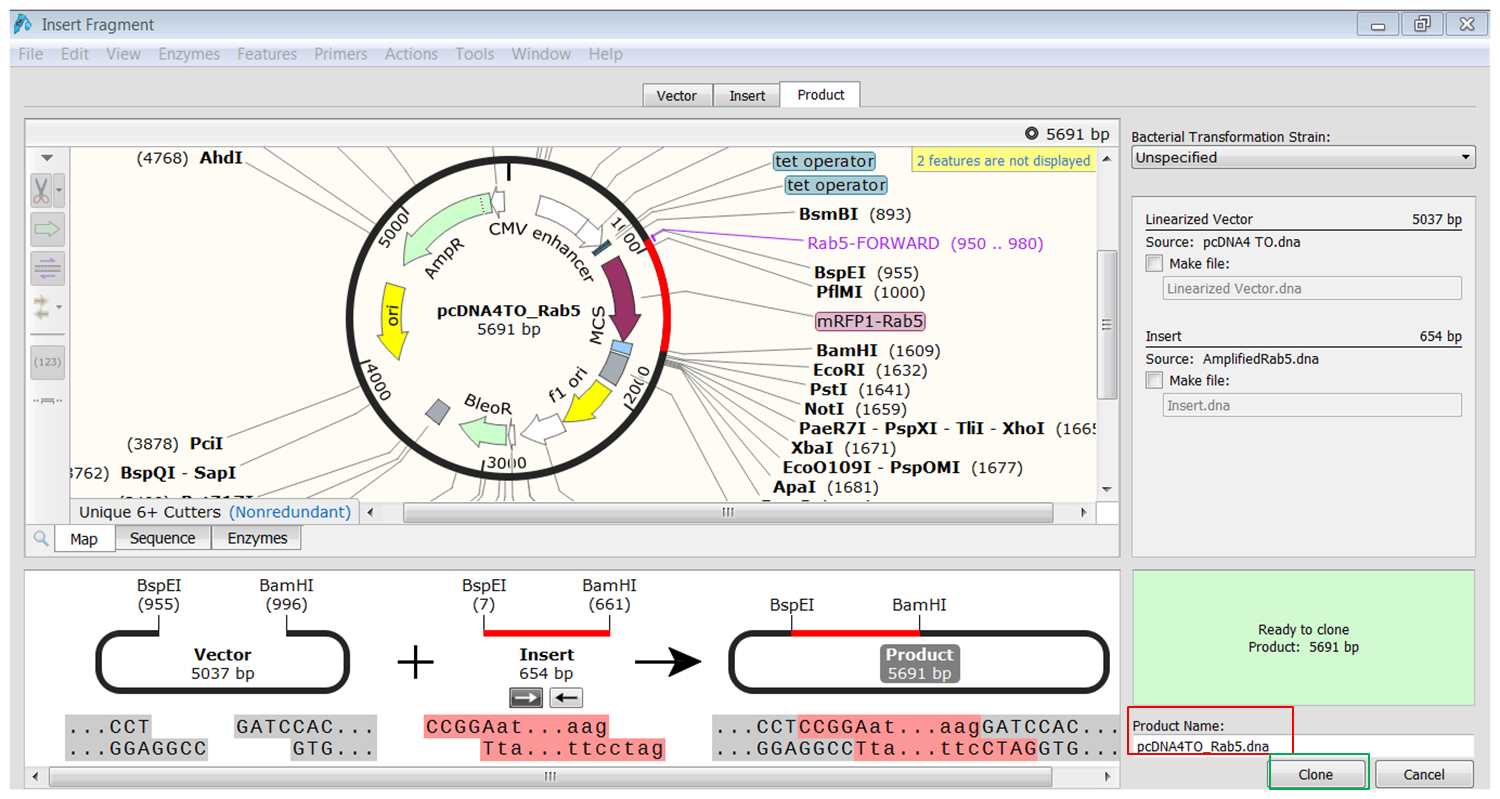
This opens the Cloning window. At the bottom of the window you see an overview of the cloning strategy. Type a name for the product (red). When you click the Clone button (green) you generate the product. |
Showing the cloning process
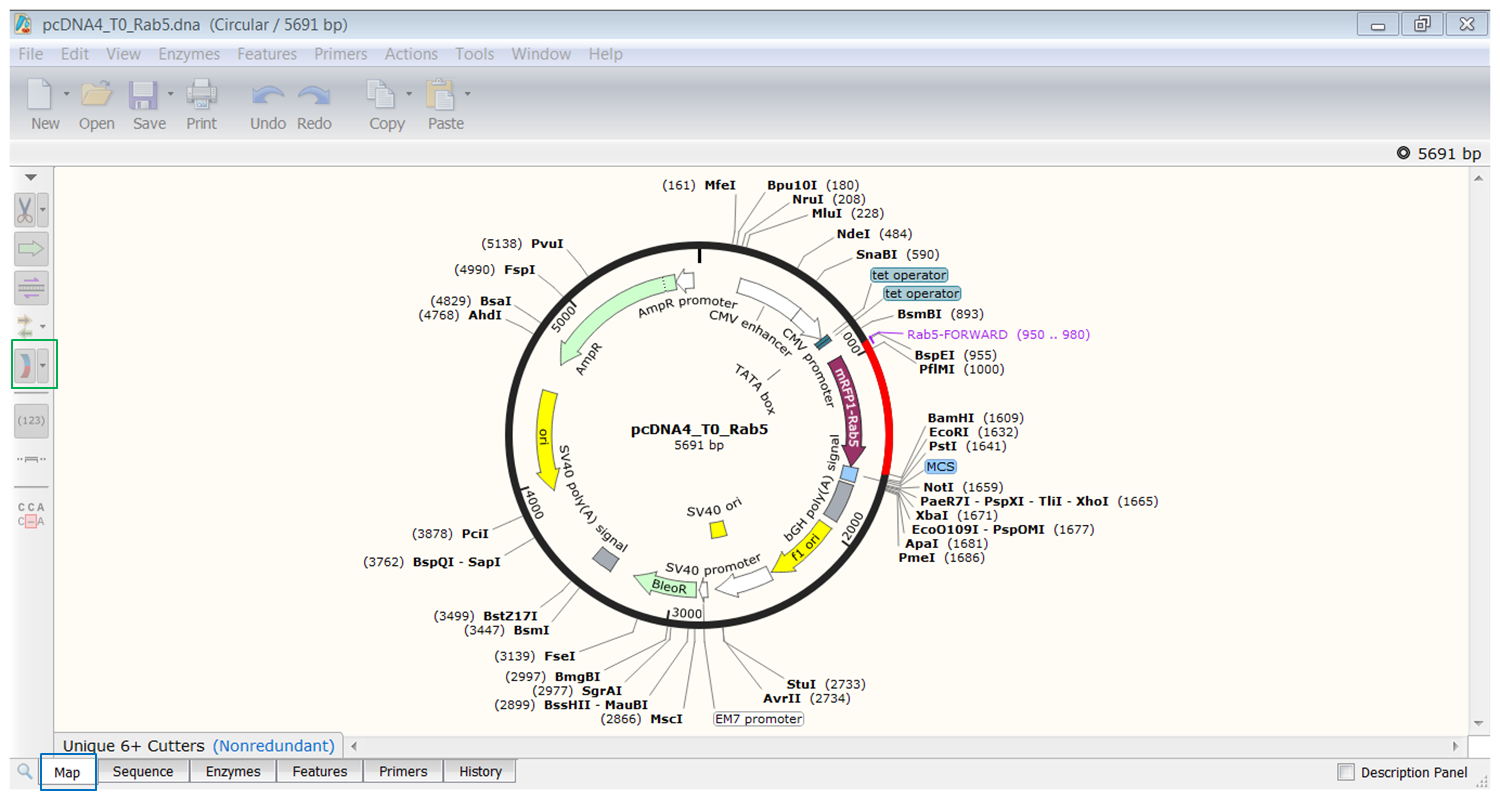
Go to the pcDNA4_TO_Rab5 sequence: this is the product generated by cloning the Rab5 gene in the pCDNA4_TO vector
Clicking the History tab in the view shows how this sequence was generated:
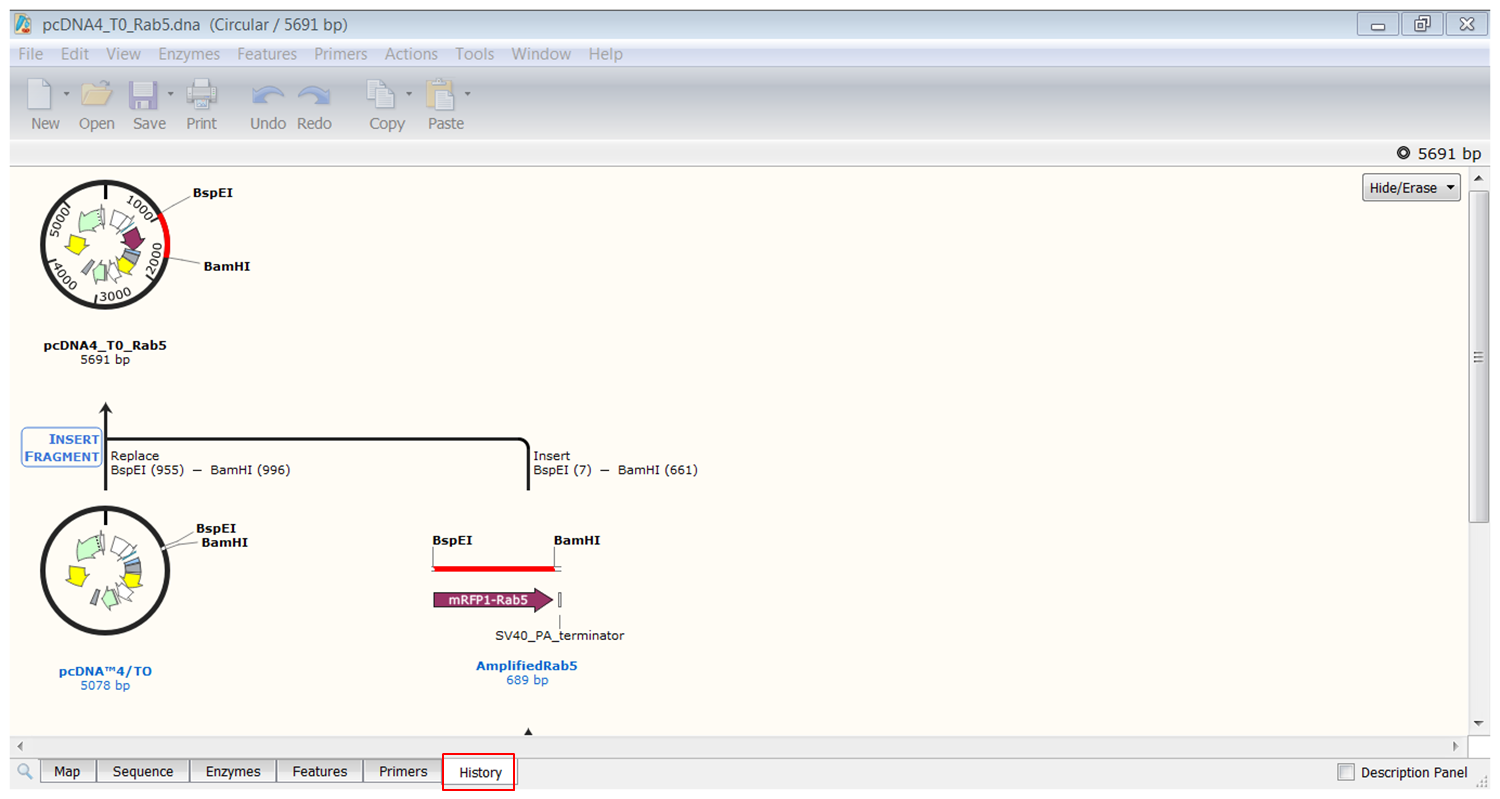
This visual representation of the cloning process is very informative and could be used in publications.
| Save the history of pcDNA4_TO_Rab5. |
|---|
| Right click the figure and select Export History. |
Clicking the Show colors button (green) in the Map view (blue) shows the insert (red) and part of the sequence that corresponds to the vector (black)
