Fusion-based cloning in SnapGene tutorial
Go to parent SnapGene
SnapGene has a list of In-Fusion ready linearized vectors from Clontech on its website.
The file containing the vector that we are going to use, pAcGFP1-N In-Fusion® Ready, is available in the folder /Documents/SnapGene . Load the sequence in SnapGene.
Contents
Open the cloning editor
| Open the cloning editor |
|---|
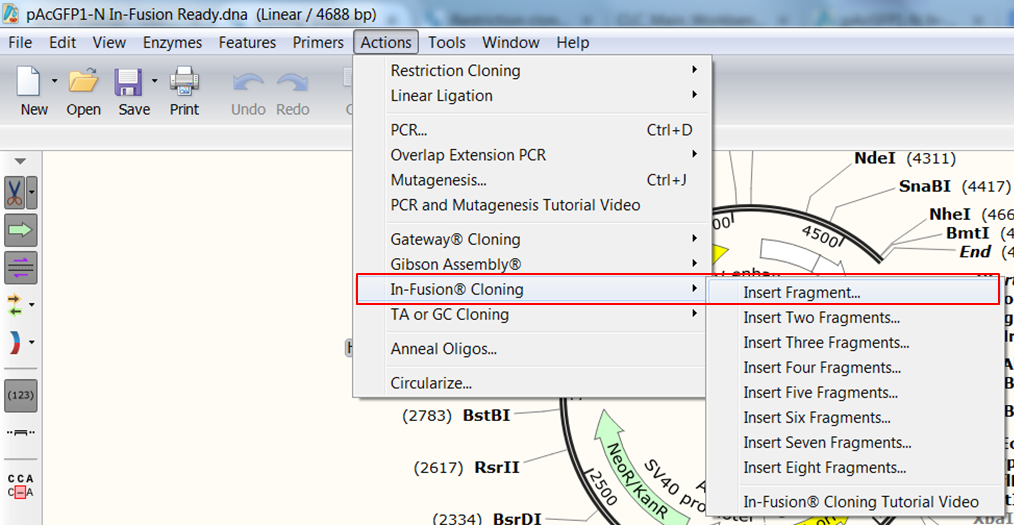
| Expand Actions in the top menu, select In-Fusion Cloning and then Insert Fragment. |
Prepare the vector sequence
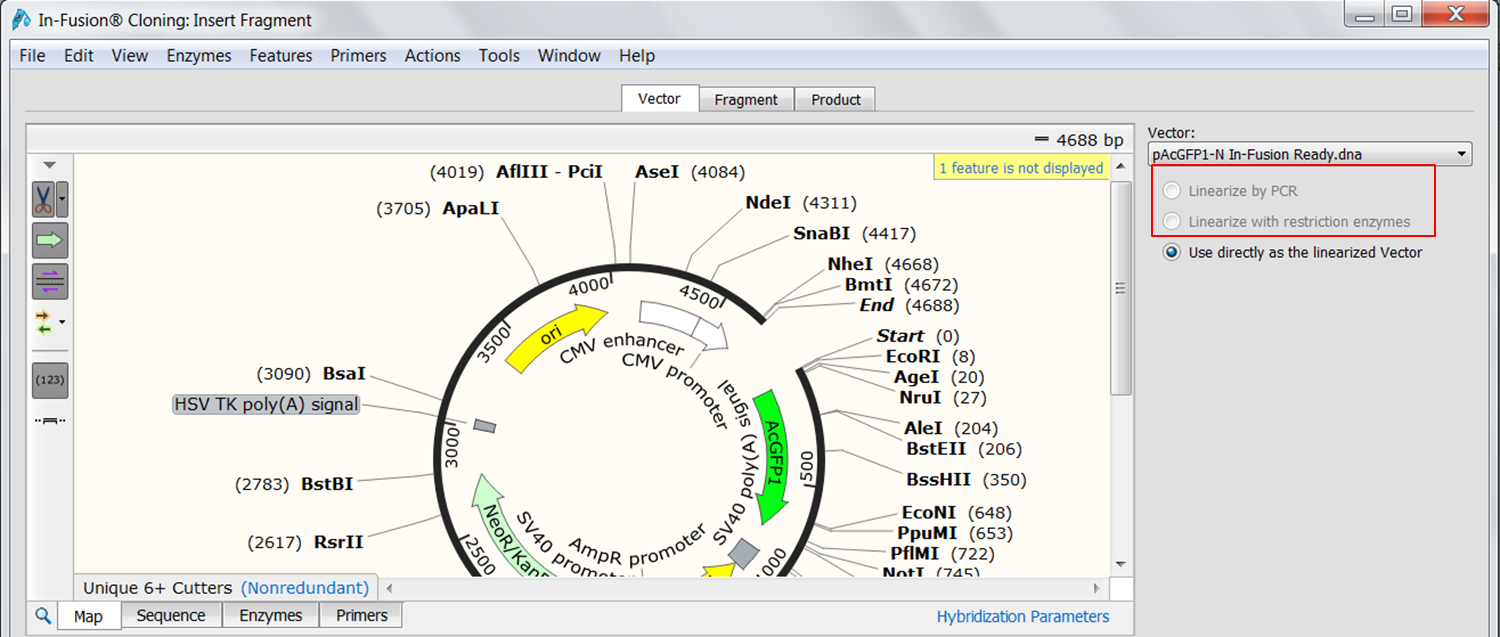
The cloning editor opens on the Vector tab where the vector that was loaded when you opened the cloning editor (pAcGFP1-N In-Fusion® Ready) is opened automatically. Since this is an In-Fusion vector it is already linearized. If this was not the case you could linearize the vector by PCR or restriction digest.
Prepare the insert
We are going to clone Rab5 into this vector thereby created a N-terminal fusion of Rab5 to AcGFP1.
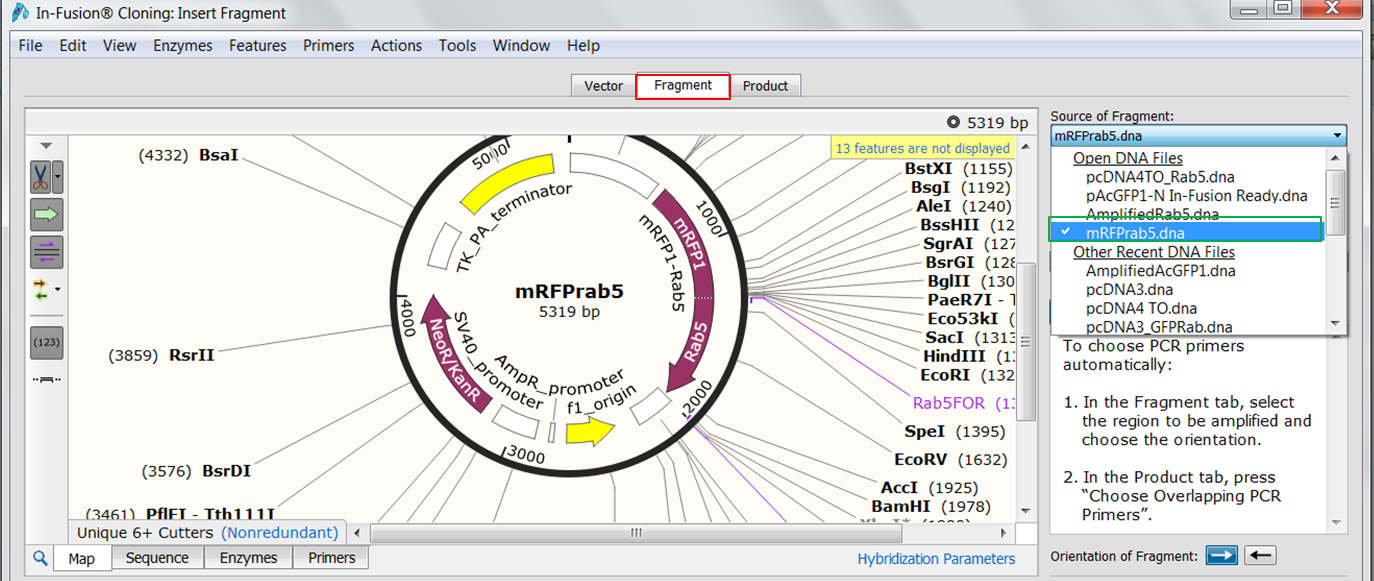
| Select the fragment to insert. |
|---|
| Open the Fragment tab (red) and select mRFP1Rab5 as the source of the fragment (green).
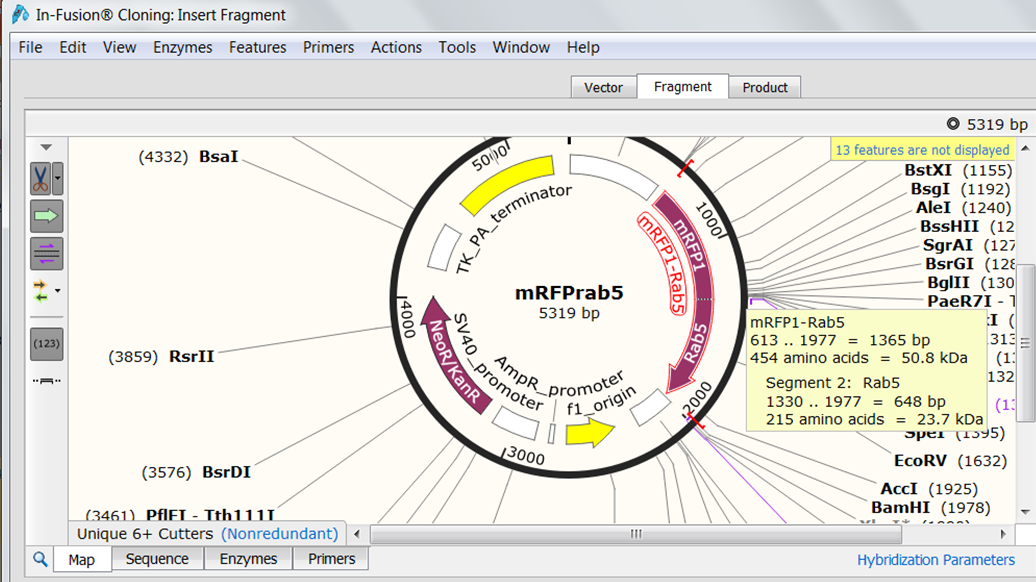
Hover your mouse over Rab5 to see its exact location. Open the Sequence view and scroll to the Rab5 gene (1330-1977). Select the sequence from the start codon to the fifth last base base of the gene (you do not want to include the stop codon in the fusion and you want to insert Rab5 in frame). Go back to the Map view to see the selection. Both genes are in the same orientation so you do not need to reverse the orientation. |
You do need primers to amplify Rab5 from the mRFP1Rab5 vector creating overlaps with the In-Fusion vector. SnapGene can design these primers automatically.
| Automatically design primers to amplify Rab5. |
|---|
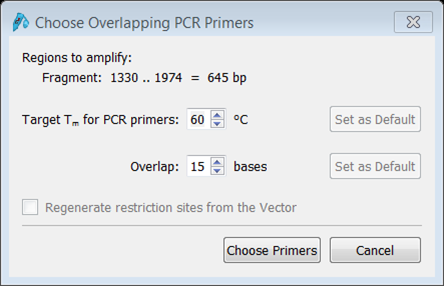
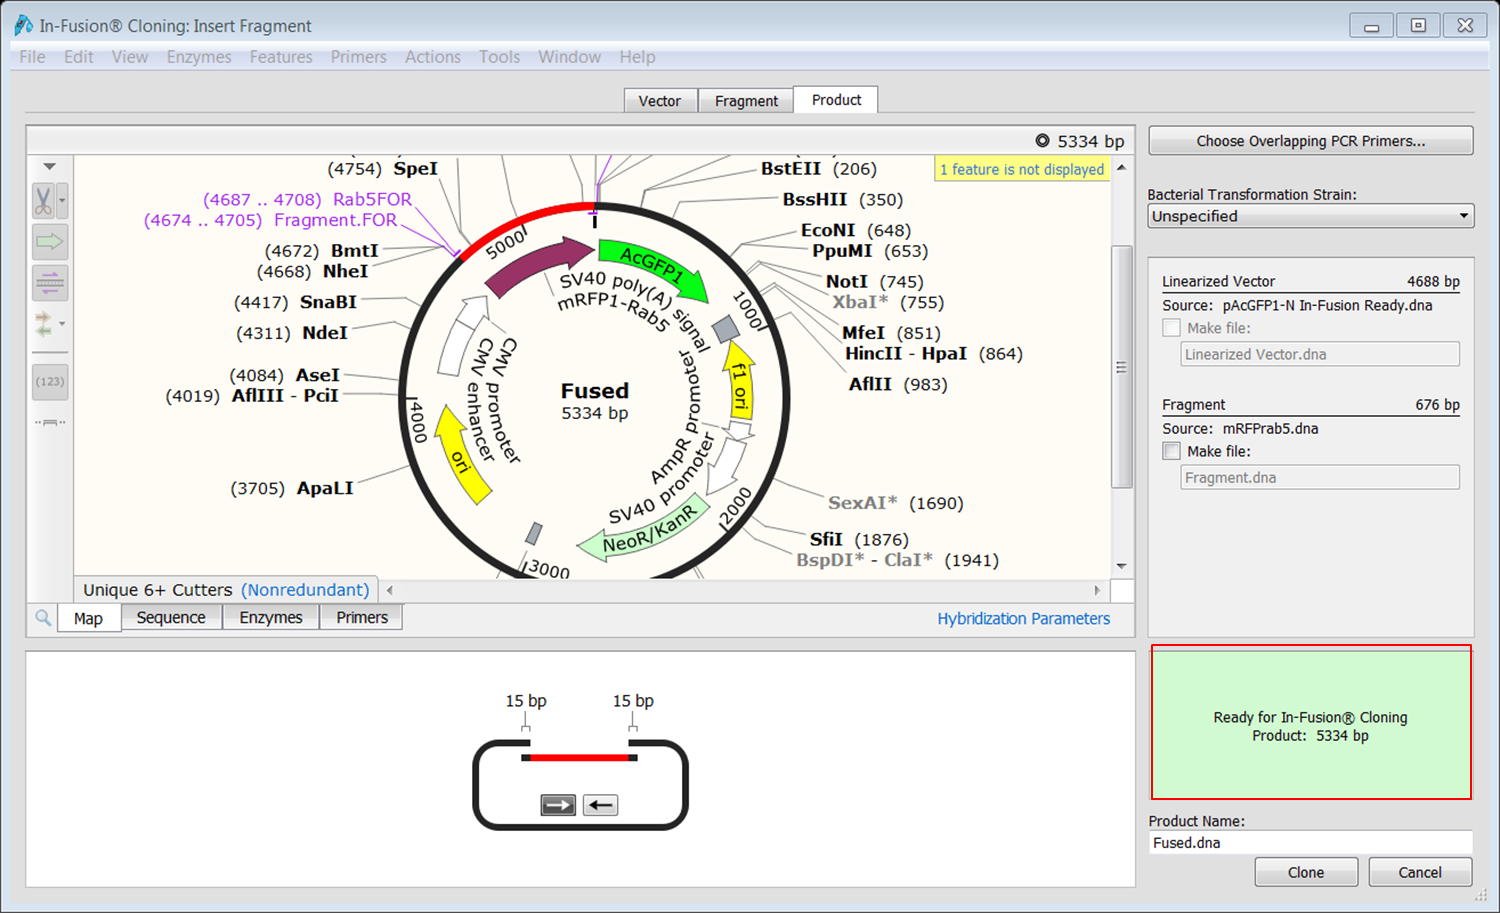
| Open the Product tab (green) and click the Choose overlapping PCR primers button (red).
We'll use the default values for Tm and number of overlapping bases. Click the Choose Primers button and the cloning product appears. If you insert the fragment out-of-frame an error message will appear in the green block at the bottom (red). |
| Fetch the sequences of these primers. |
|---|
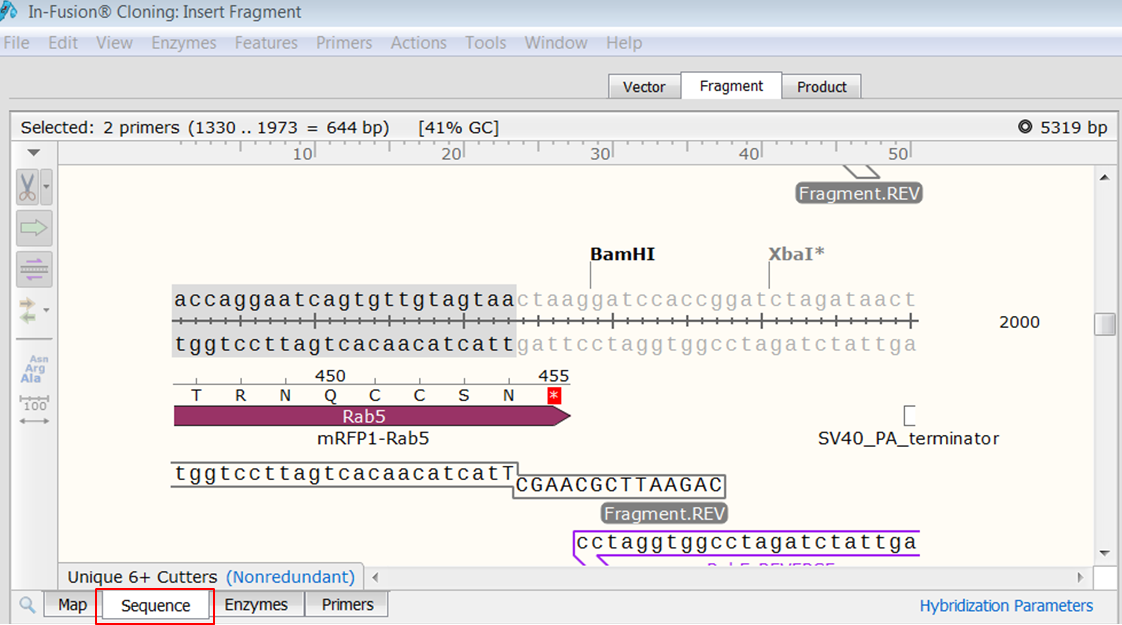
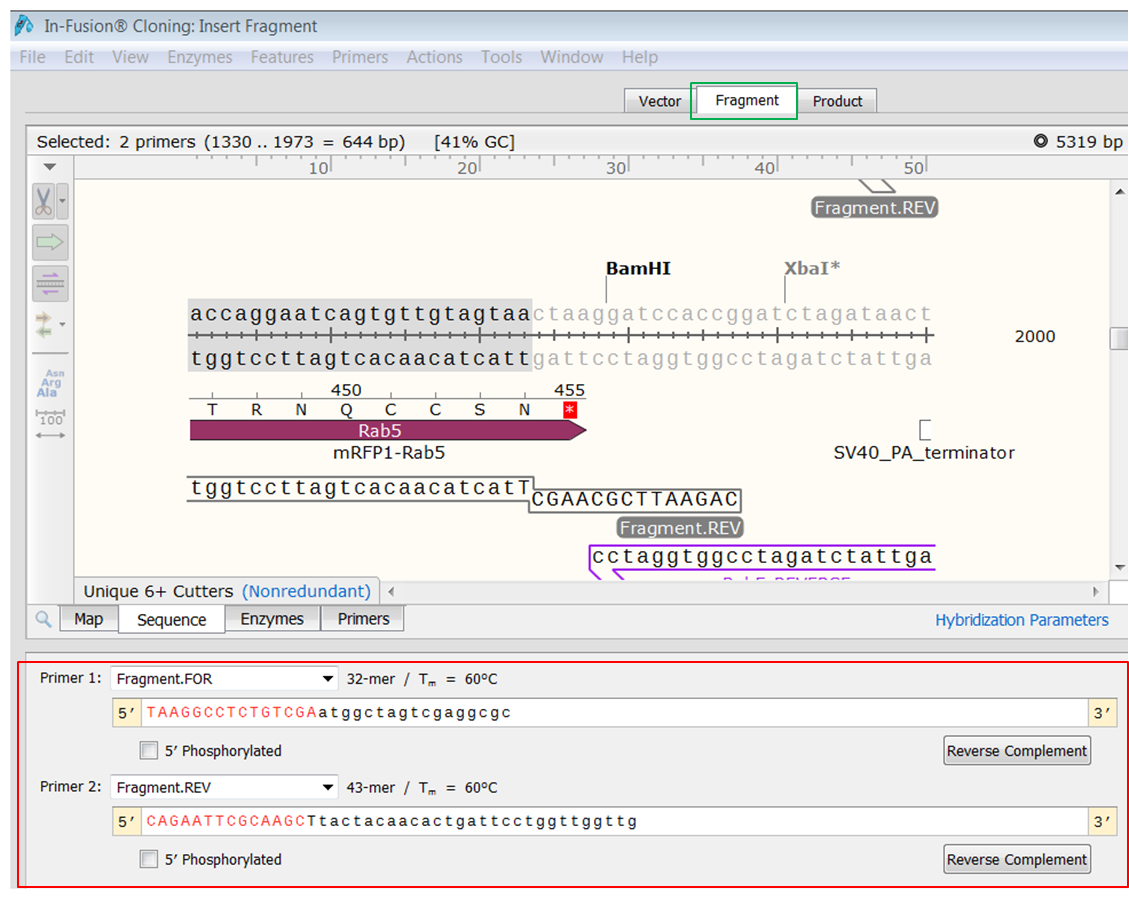
| Open the Fragment tab and look at the bottom view.
Here you see the sequences of the primers. The red bases are added to create overlaps with the ends of the linearized In-Fusion vector. |
Perform the cloning
| Create the construct. |
|---|
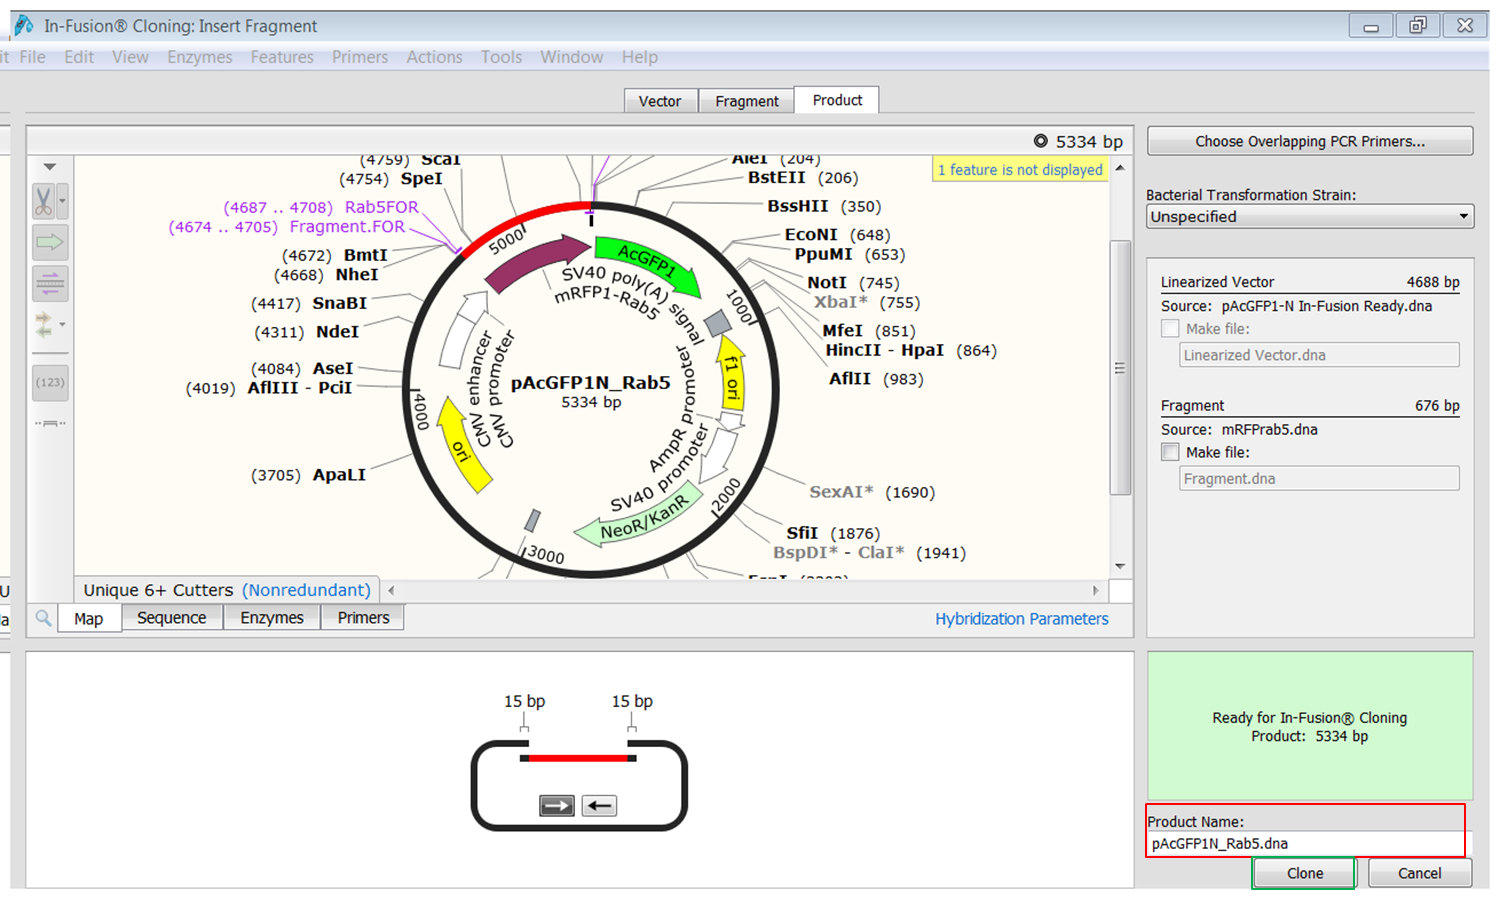
| Open the Product tab and fill in a name for the product at the bottom (red).
Click the Clone button (green) to create the construct. Save the construct. |
| Check the fusion. |
|---|
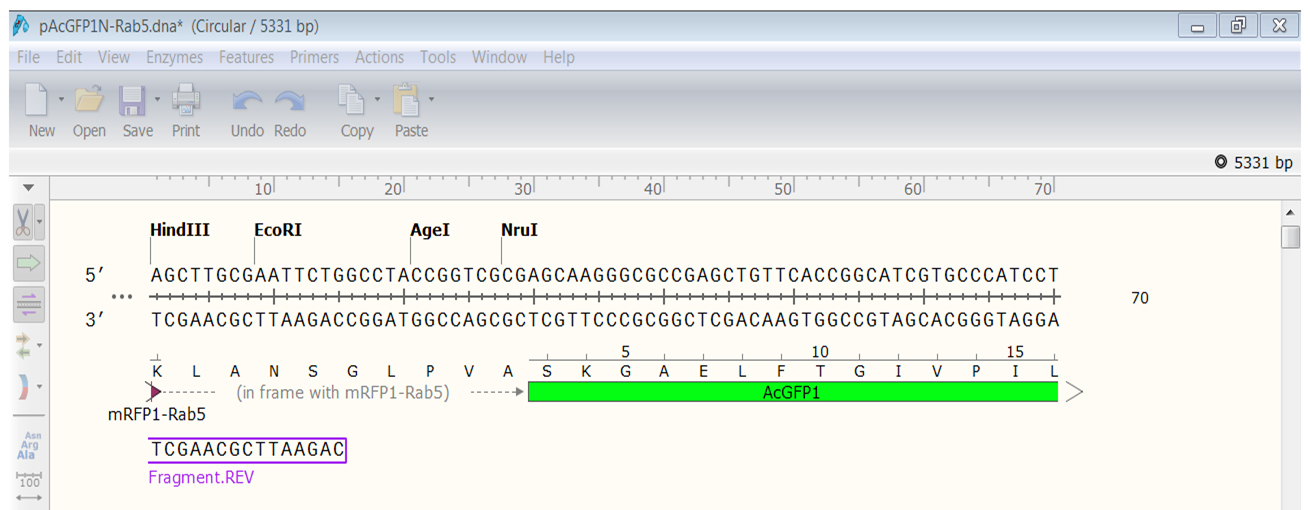
| Open the Sequence view of the construct and look at the first line.
Rab5 is nicely fused in frame with AcGFP1. |
Show a graphical overview of the cloning procedure
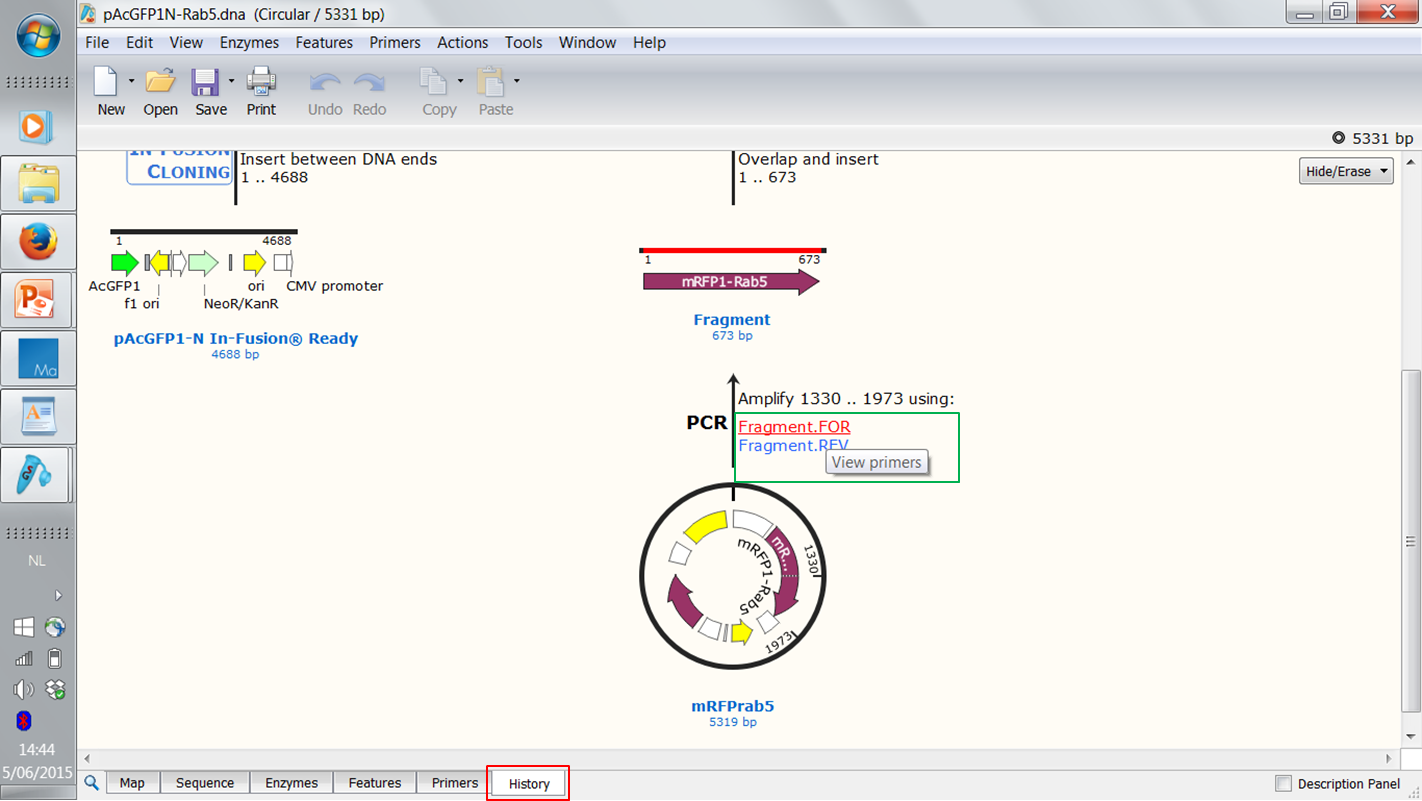
| Show a graphical overview of the cloning. |
|---|
| Open the History view (red) of the construct.
Note that these figures are clickable: you can click the primers to view their sequences (green). |
Obtain the sequences of the primers
| Another way of checking the sequences of the primers. |
|---|
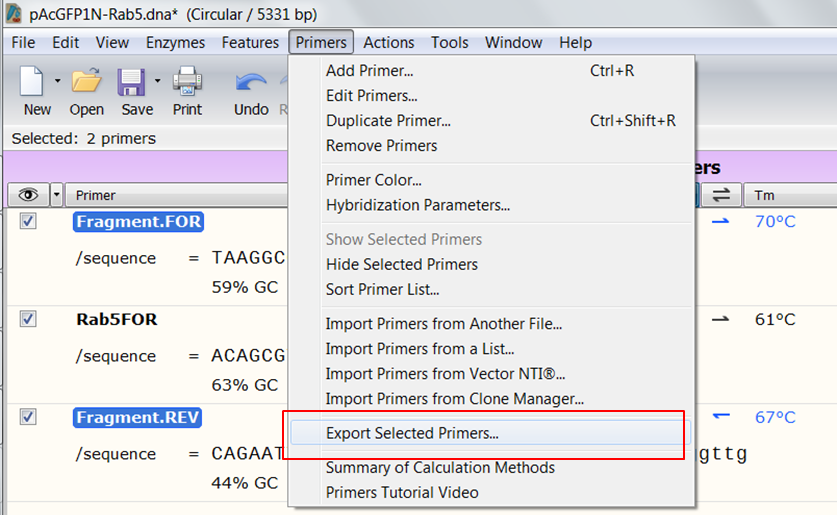
| Open the Primers view of the construct (red).
The 'Fragment' primers (green) are the ones that are used in the In-Fusion cloning. The Rab5FOR primer is a remnant of the restriction cloning where we cloned Rab5 into the pcDNA4_T0 vector. |
| Export the primers so you can order them. |
|---|
| Open the Primers view of the construct. Select the two 'Fragment' primers by clicking their name and holding the Ctrl key during selection. In the top menu expand Primers and select Export Selected Primers
This will save the primers as a .txt file on your computer. |
See the In-Fusion cloning video tutorial for further details on how SnapGene can simulate Clontech's In-Fusion Cloning while helping you to visualize, control, and document the process.
