Create a virtual machine running a Linux distribution using VirtualBox
Go back to parent page Introduction to Linux for bioinformatics
On this page we will show how you can run a Linux operating system (OS) as a virtual machine on your computer (multi-core with decent amount of RAM). We will make use of VirtualBox (by Oracle) to achieve this.
Contents
Install VirtualBox
Download
Go to https://www.virtualbox.org and choose Downloads. Download the correct installer for your platform and install VirtualBox on your computer.

Enable CPU properties
Sometimes VirtualBox displays errors when starting. Or trying VirtualBox for the first time, a virtual machine might not start. These problems might be related to not having virtualization enabled on your CPU.
All the latest processors and motherboards support virtualization technology (vt-x/amd-v). It many cases, VirtualBox requires this to be enabled. To do so, you have to reboot your computer, and get into the BIOS menu. In the BIOS menu, you should enable virtualization. Where this setting is located is different between computers, so check your hardware vendor for the BIOS options, or browse around in your BIOS menu until you find it. Most of the times it is named in a decent way. Enable the option, and boot your computer.
Download a Linux distribution of your choice
Go to http://www.distrowatch.com, and choose among the listed distributions. In this tutorial, we will work with Linux Mint. A long term release (LTS) means updates will be provided for years to come).
We need to download an .iso file, which is a (binary) copy of an installation DVD containing your distribution of choice. You can find it in the downloads section of the distribution's web page. You can download it using a direct download, depending on your preference and the options offered by the distribution's web page.
After the NGS trainings we will distribute a set of iso-images that you can install in Virtual Box in a similar way as described below for the standard Linux distribution. These images are all based on Linux Mint 17 but contain all additional tools and data you need for repeating the analysis done in the RNA-Seq and the DNA variant analysis training. For each training we will distribute two images:
- System containing all the tools
- Data containing all the data
Install the virtual machine
The install process in Oracle VM VirtualBox is exemplified with screenshots below. In summary:
- create a virtual hard disk
- run on that disk a linux distribution in live modus
- start the installations from within the live modus
To start the VirtualBox new virtual machine wizard, click on the New button in the top bar.
Be sure to set the type of linux machine to 64 bit! See below

Do not overcommit RAM to the virtual machine. Make sure you stay in the green zone. If you overcommit, the host system can run out of RAM, and can become unresponsive, terminating the guest system, as well as itself. So for a standard Linux 1GB is sufficient.
However, for the images of the NGS trainings you need to provide as much RAM as you can miss (while staying in the green zone).

The hard disk of the virtual machine is one big file. This is the equivalent of the physical hard disk in your host computer. (Advanced: for a virtual machine you can also select a block device as hard disk instead of a file).

You can specify different format of the disk file. I usually choose VDI (default VirtualBox), for performance issues. If you ever tend to migrate your virtual machine to another host computer, you might choose VMDK, which is a bit more portable.

If this machine will be heavily used, you might consider a Fixed size disk.

Take 10GB for a standard Linux distribution. However for the images of the NGS trainings, you need a 32GB disk for the system image and a 16GB disk for the data image.

Now you machine appears in VirtualBox's machine list. To start it, click the Start button (green arrow). Now it will first ask you to attach the .iso image of your linux distribution of choice. Navigate to the .iso file of your choice.
This will fire up the virtual machine in Live modus. Let it proceed.

Now the virtual machine is running in Live modus.
![]() Warning: You have to proceed to installation immediately! The hard disk file is still empty in this stage. The OS runs from the .iso file. If you start working and using the virtual machine now, nothing will be saved! This modus is just intended for testing.
Warning: You have to proceed to installation immediately! The hard disk file is still empty in this stage. The OS runs from the .iso file. If you start working and using the virtual machine now, nothing will be saved! This modus is just intended for testing.
Click Install Linux Mint to start the installation. The installation will take about 10 minutes.


User information will be asked while the installation is in progress. Choose bits as user name and bitstraining as password.


After installation is complete, you can use the virtual machine further, or reboot the machine immediately. There is no point in continuing with the live version. Click Restart Now.
The system will do a virtual restart: at some point it will ask you to hit the Enter. Do so.
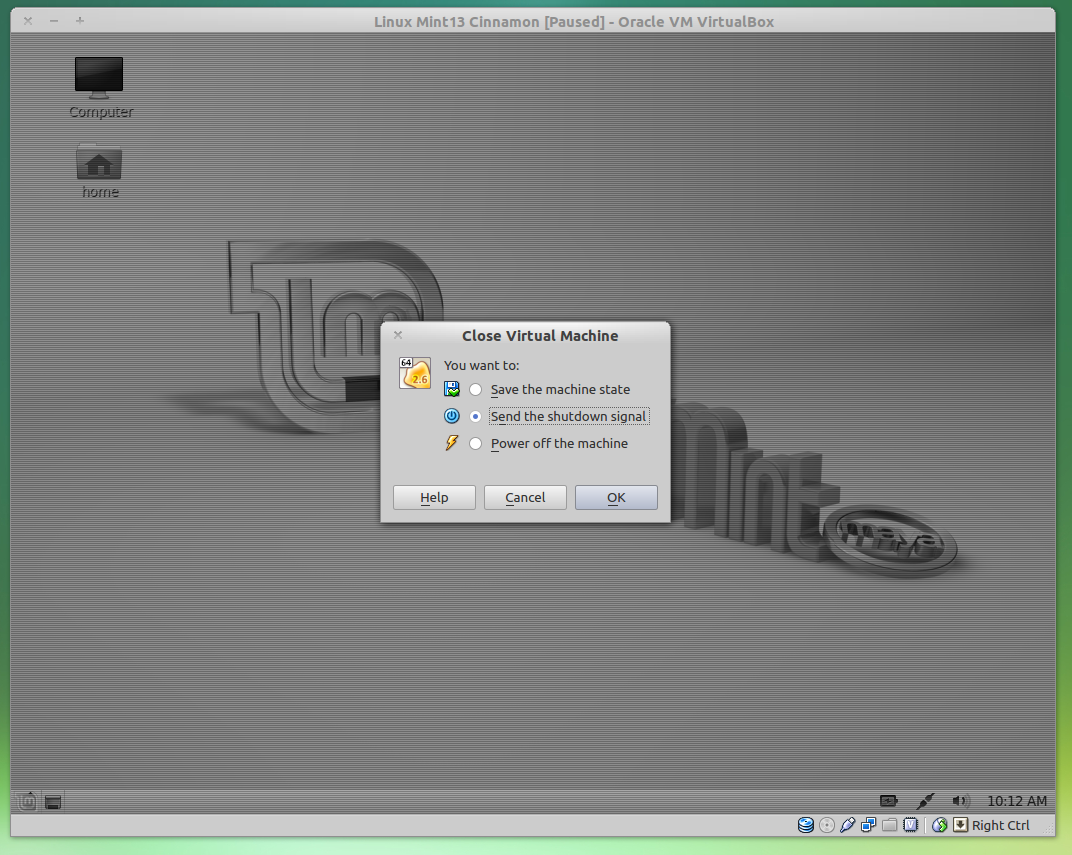
It is possible that the VirtualBox will hang during the restart (after you have hit the Enter key. If that happens just close the Virtual Machine. Select Power off the machine

And just restart the virtual machine.
After rebooting, it is good practice to use the Update Manager to install updates.

Virtual machine peculiarities
Switching between the virtual machine window and the host
I won't happen often anymore, but keyboard and mouse input can be a bit messy in virtual machines. Some information about this.
Your input devices (mouse and keyboard), are often 'captured' by the virtual machine. The input devices are redirected to the virtual machine. To leave the virtual machine screen, press the ctrl key located on the right side of your keyboard. Press it once, the mouse/keyboard will not be attached to the guest screen (it is now dedicated to the host); press it again, and the mouse/keyboard will again be captured by the guest.
There is an easier way. To avoid issues with the mouse not being able to 'leave' the guest screen, install the VirtualBox guest additions in your virtual guest (next paragraph).
Install VirtualBox guest additions
VirtualBox offers additional software to be installed in your virtual machine, software which facilitates the communication between the guest and the host (e.g. USB device integration in the guest, mouse integration, ...).
When you install Linux Mint, these additions have already been installed. It is not advised to reinstall the guest additions.
If you need to install the guest additions, start the guest and when the guest is fully operational press the right ctrl button on your keyboard + D. This will cause the virtual software disk to be available in your virtual machine. Open this disk in your guest, and follow the installation instruction on this disk.
You need to install the VirtualBox guest additions for this (see previous paragraph).
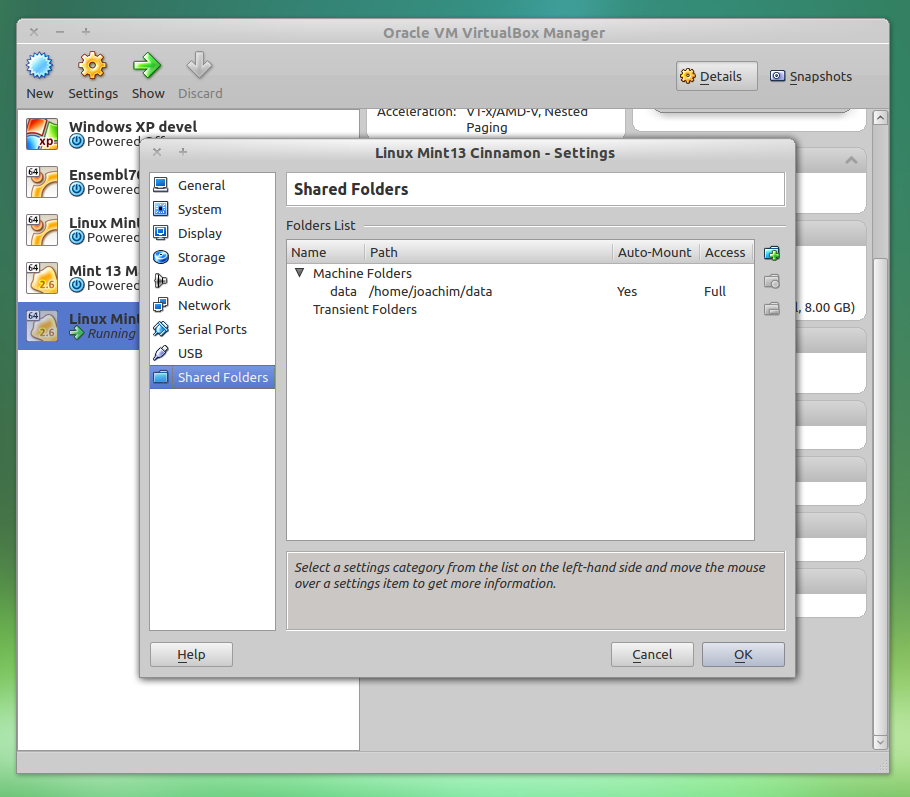
In the settings of the virtual machine, add the folder that you would like to be available in the virtual machine. Very important is the name you give for this shared folder. We will use this name in the virtual guest.
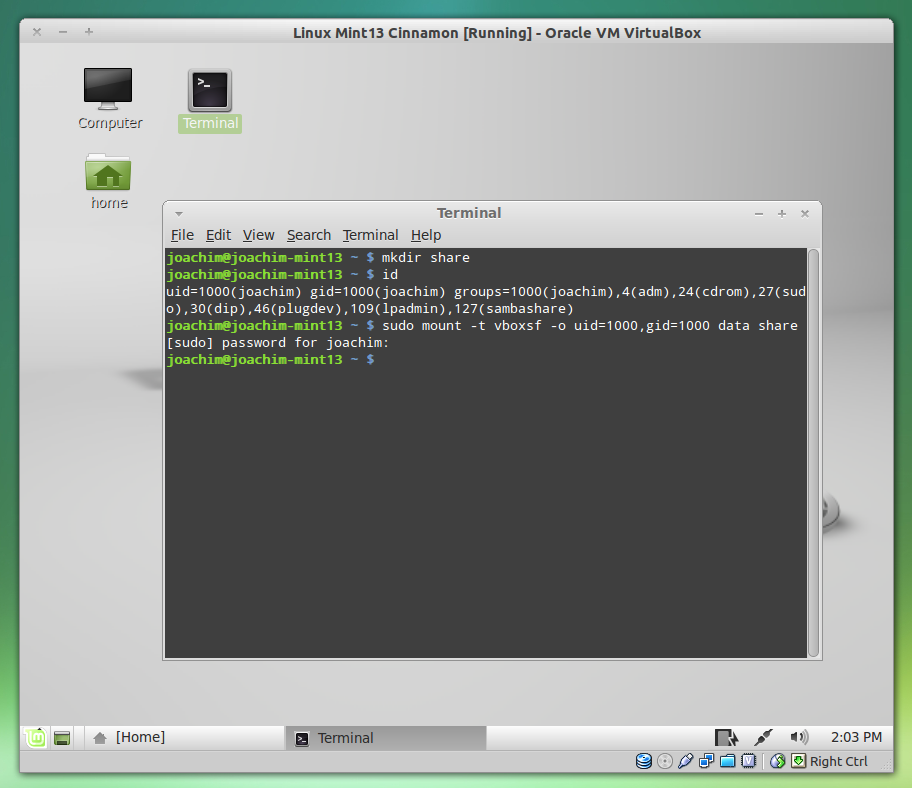
(Re)start the virtual machine. We have to make the shared folder available in the virtual machine, by typing in some commands in the terminal. Open a terminal in the virtual machine. Make a folder in your home directory (mkdir) in the terminal (or just by choosing 'New Folder' in the file browser - it doesn't matter). Next, find out the identification number associated by your user, by typing id. The uid (user id) and gid (group id) are of importance now. Next, make the folder available through mount.
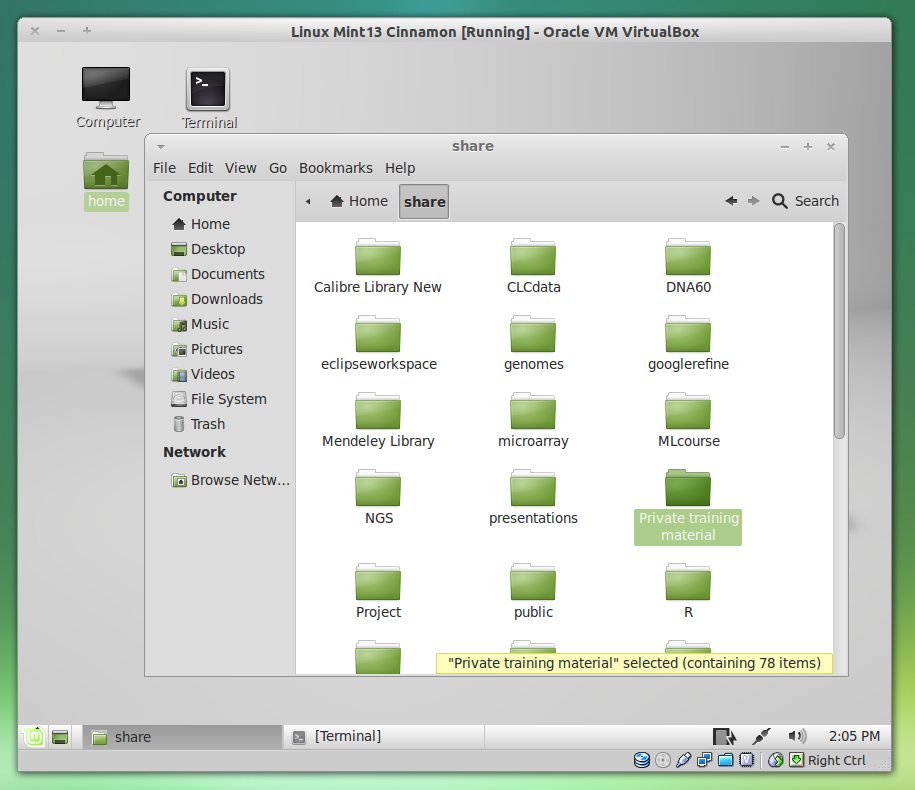
Now you have the shared folder available in your home directory. You can browse the folder with your file browser.
Note: when you restart, you have to type these commands again. You can add it to a startup script however (which is outside the scope of this tutorial).
Cloud storage
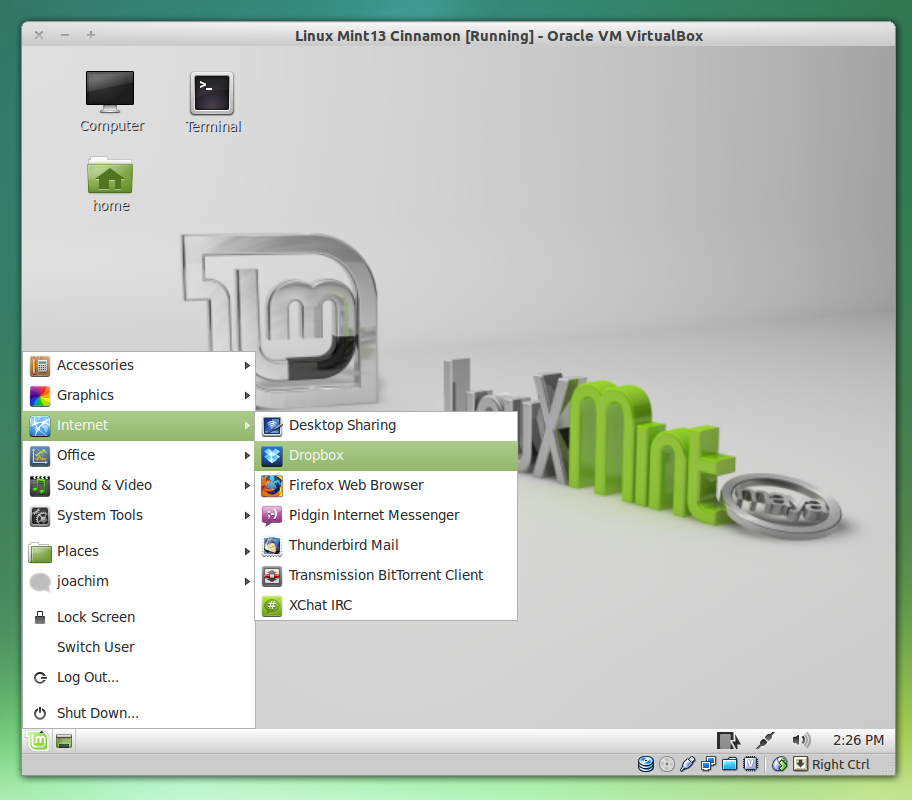
Yet another way, and perhaps much simpler, is to make use of cloud storage. There are different providers of cloud storage. This process involves installing a little program, the client, of the cloud provider. We exemplify the process below by installing and using Dropbox. The client of Dropbox is readily available in the repositories of many distributions.
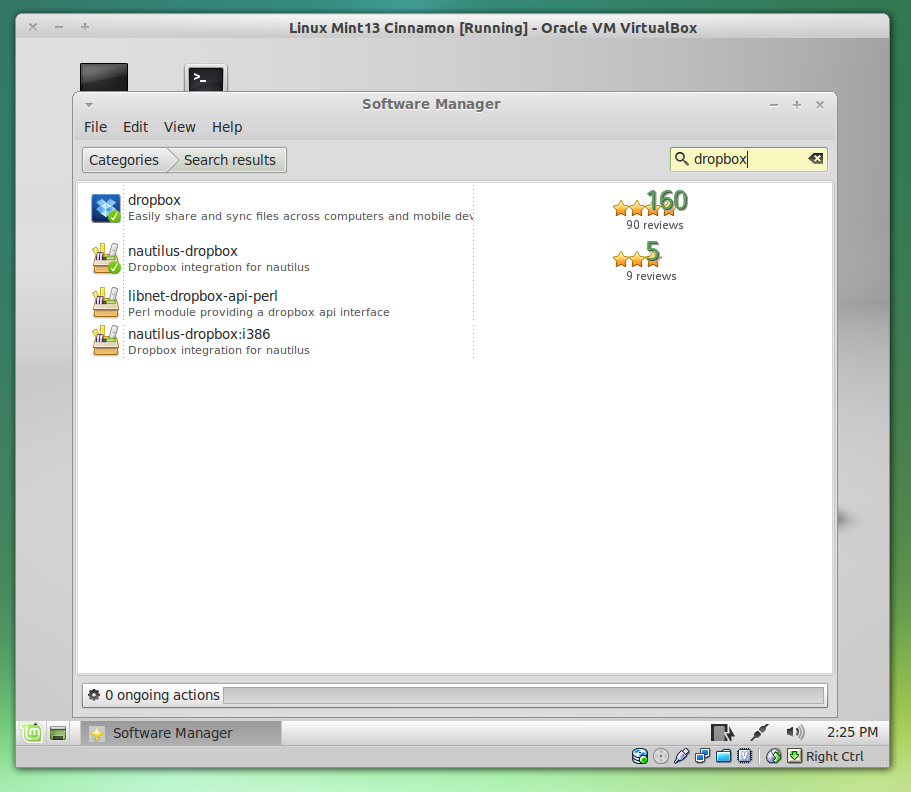
Open the software manager of your distribution, and search for Dropbox. Click install to install the Dropbox client. You will have to provide your password to identify yourself.
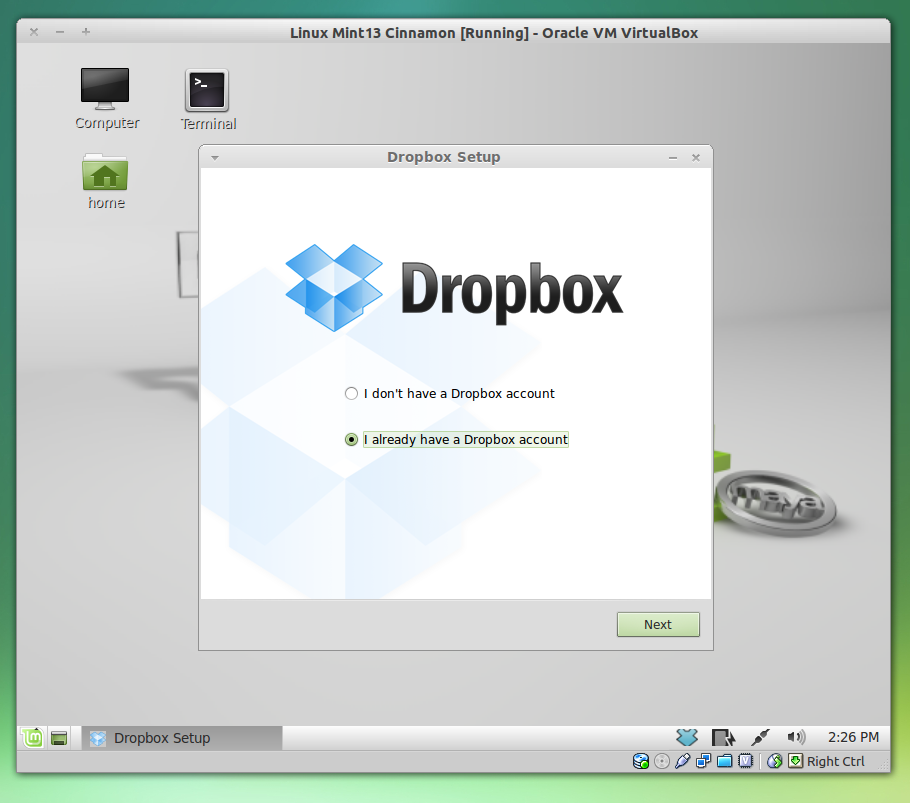
Once Dropbox is installed, you need to provide your credentials in the Dropbox client.
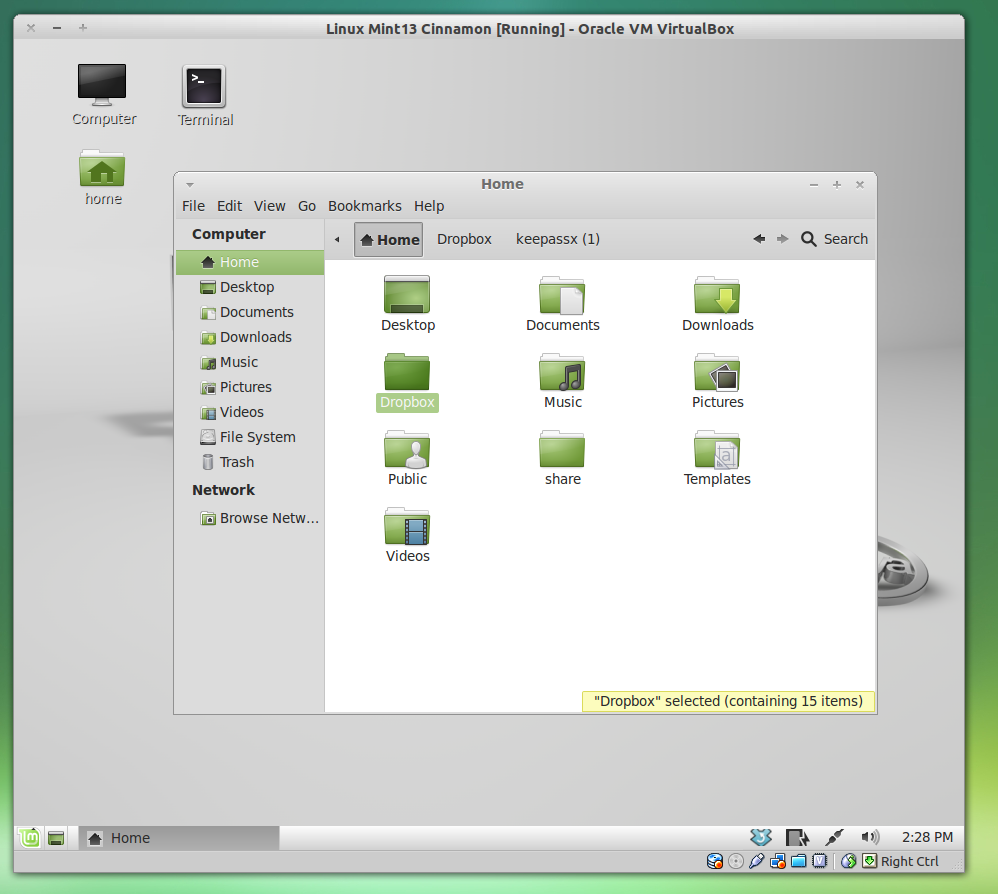
After the client is connected with your account, the Dropbox folder starts syncing, and the files become available in the virtual machine.
Networking
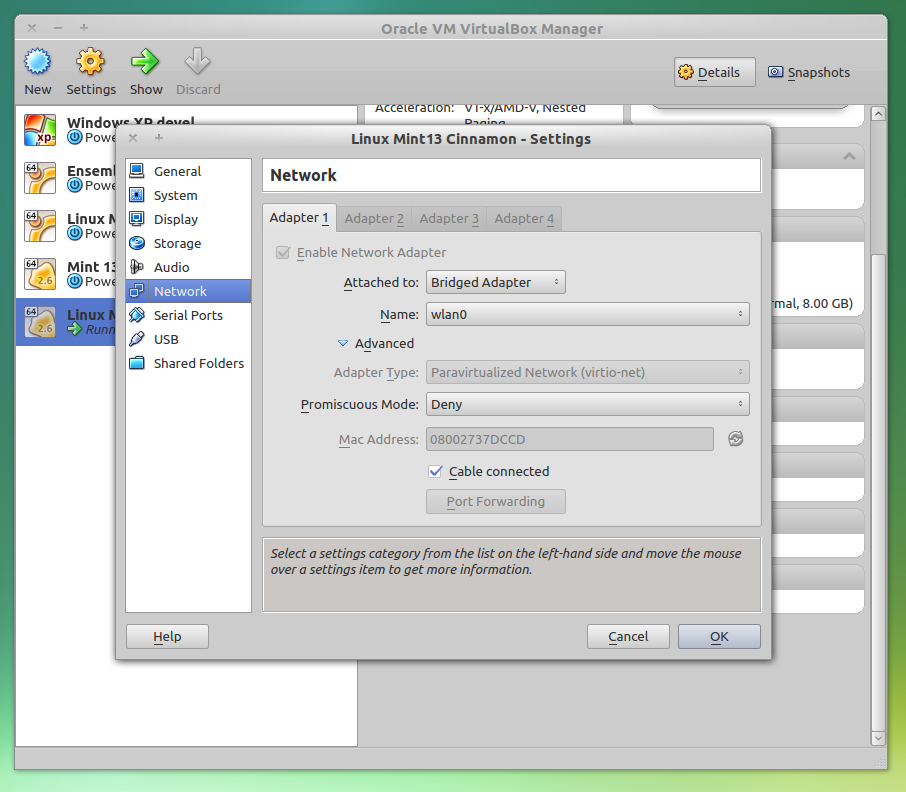
You can attach up to 4 NICs (network interface cards) to your virtual machine, in the settings of your virtual machine, Network division.
The 2 types of most interest are NAT and Bridged adapter.
NAT
If you select this type of virtual NIC, your host listens on its physical network card and passes the traffic for the guest on to the guest. The guest has received an address of the host to do this. The guest is not visible to other computers on the network.
Bridged adaptor
If you want the virtual guest to be visible to all computer on the network, you select a bridged adapter. This adapter connects directly to a physical NIC, and the guest controls the traffic directly from the NIC. The host does not interfere with the network traffic. You have to make sure you set an IP address in the virtual machine, or let it receive one from a DHCP server.
Shutting down the virtual machine
From within the virtual machine
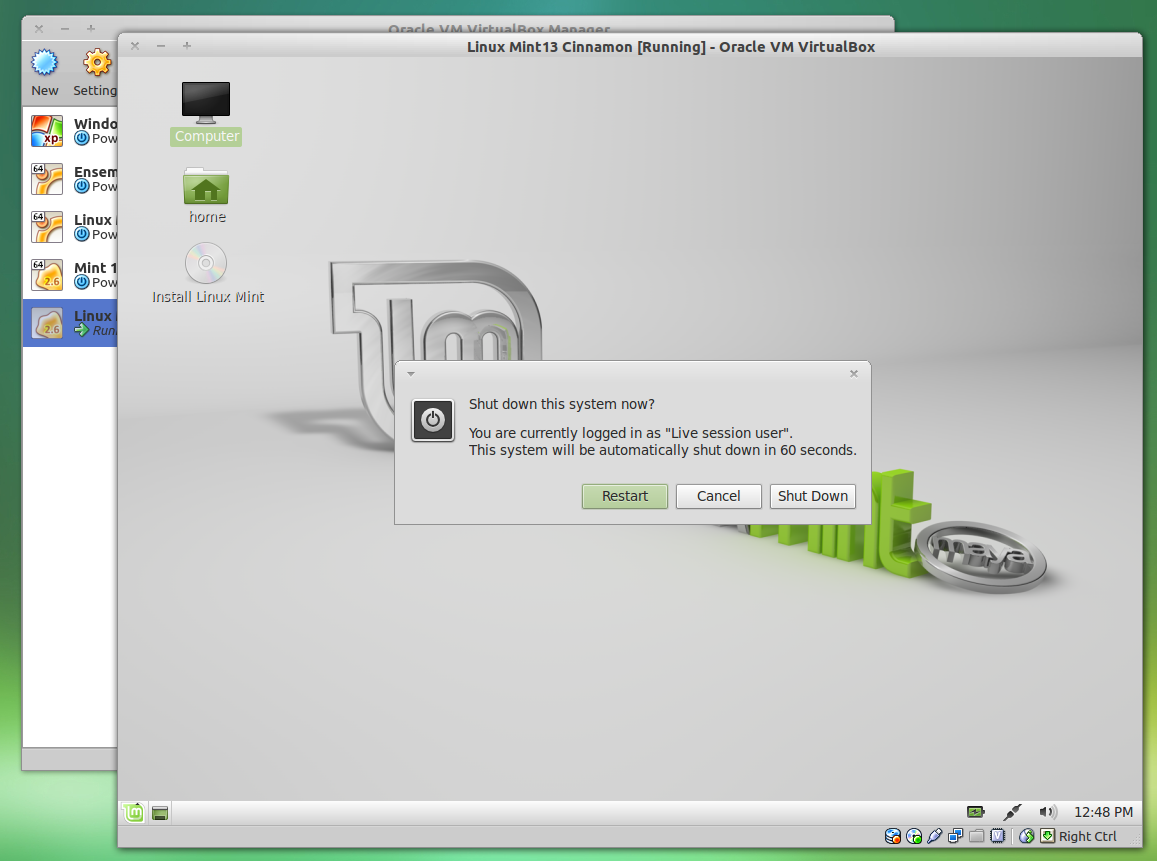
A virtual machine should be always shut down the normal way, using the 'shut down' menu.
From the host
In case you want to close the window of the host in which the virtual machine lives, by clicking the 'x', VirtualBox offers you 3 options.
- save the machine state - Comparable to suspending/hibernating. You can leave programs open, and choose this option. Next time you start, the programs are still there, doing the things that they were doing.
- Send the shutdown signal - Comparable to normal shutting down.
- Power off the machine - Comparable to a power outage of the machine. Not advised.
Go back to parent page Introduction to Linux for bioinformatics
